Thursday, January 16, 2014

Checkerboard Bracelet Tutorial

So, as promised I have been working hard to get together tutorials. It's not so much the recording of the videos that takes so much time, (though I only have quiet time when the kids are napping or late at night when they go to bed) but the fact that to produce one 20 min video takes probably about an hour of recording the initial video, 2-3 hours of editing, 2-3 hours of rendering, and about an hour of uploading and then making sure that nothing was distorted a long the way. It is a long process, but worth it in the end to be able to share my creations with everyone. It always gives me a little smile when I'm out and about and see a child wearing my designs, super neat!


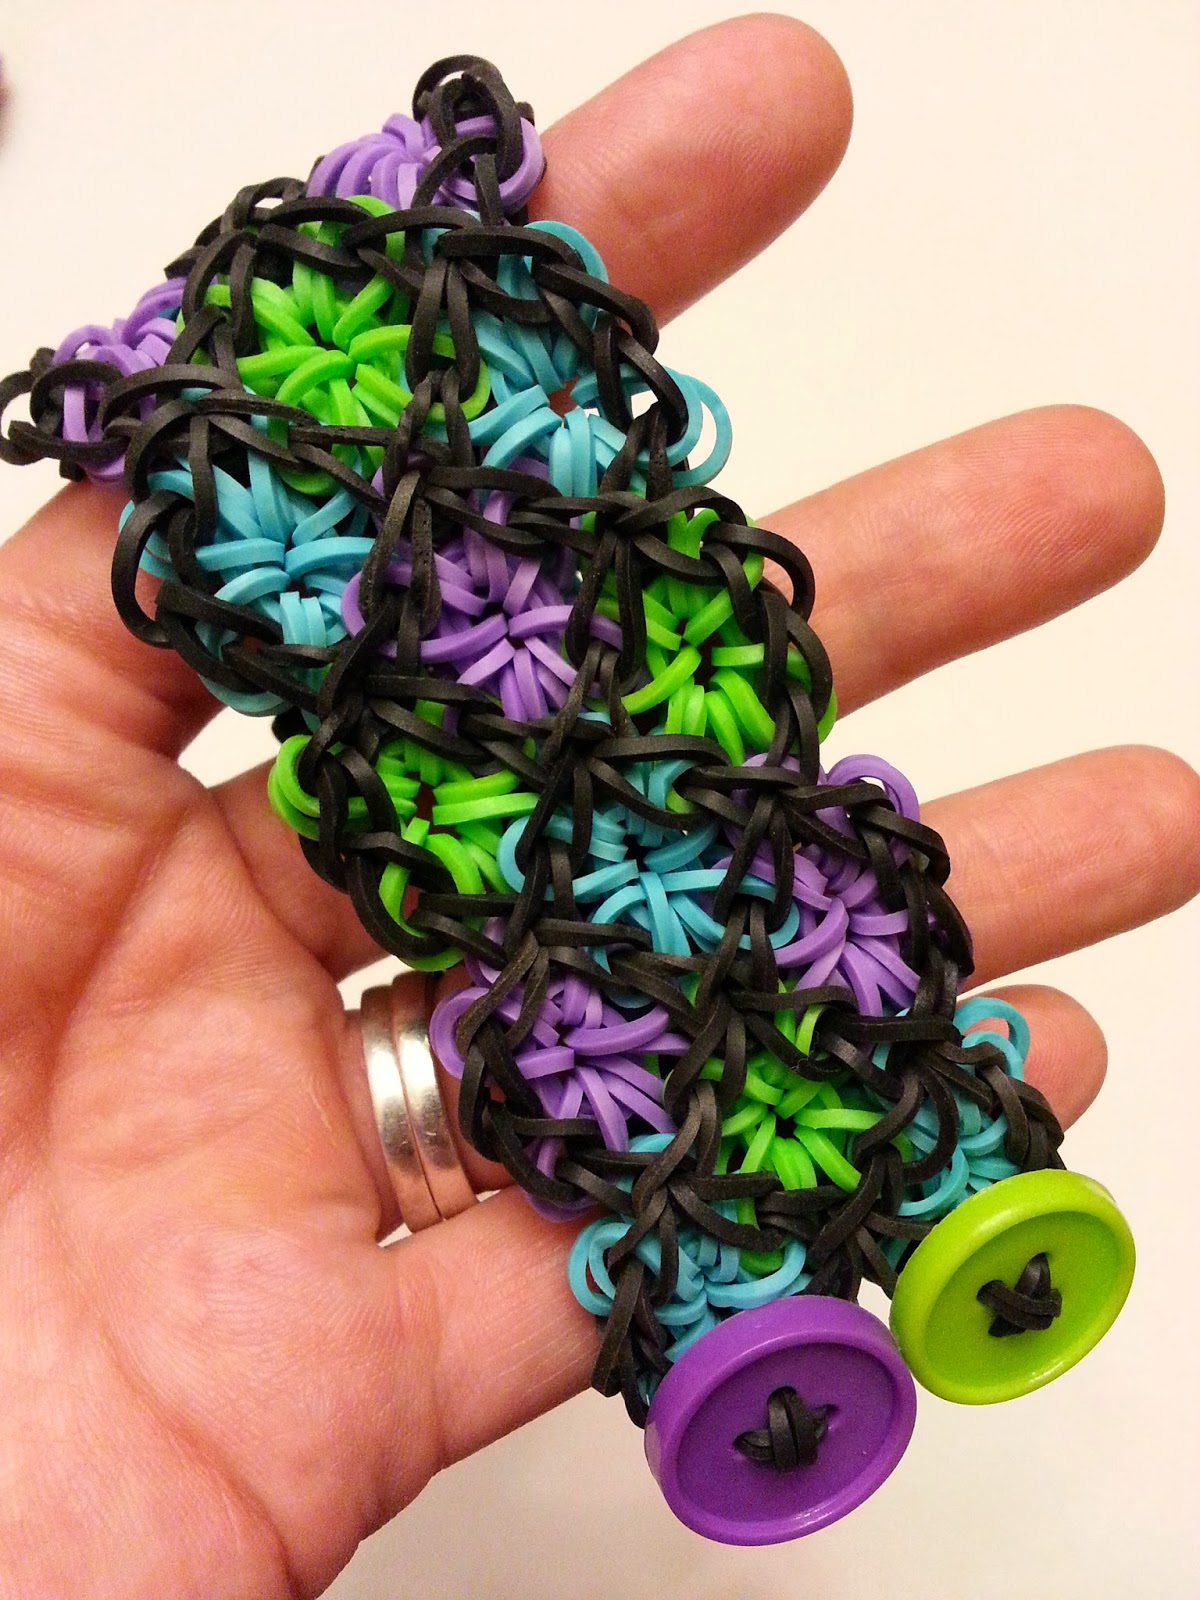
Anyways, the first tutorial that I have been able to get together is for my Checkerboard bracelet. It's a pretty simple design and not too complicated to put together, but the rubber bands do get a little tight so you want to make sure you have your loom secure and use rubber bands that have a little more stretch to them. Also, be watchful of your hook and try not to put too much pressure on it because it could break. I'm going to say that this is still an advanced bracelet, but it's not as hard or confusing as some of my other bracelets can be.


Without further ado, I present to you my Checkerboard bracelet tutorial. Enjoy!


And don't forget to check back, I have more tutorials on the way!!


Monday, January 13, 2014

Herringbone Bracelet Tutorial

Today has been a pretty good day! I went out for a little craft shopping and much to my delight, JoAnn's was having a sale on their rubber bands. A whopping 50% off their already low price of $1.99 a bag for 500 bands. That means that I would have paid .99 cents a bag, but I also had a coupon for 20% off my total purchase, so that means even less! I'd say how much I got, but who knows if the hubby reads this, lol. Let's just say that I'm stocked up for quite awhile. Plus, some of the bands were dyed differently, so it was like getting a bonus of colors!


I also grabbed another one of my favorite storage boxes for bands. They were also 50% off today, normally $19.99. Because I loom a lot, and have multiple looms, this box is perfect. It is the Art Bin Super Satchel with dividers. It's deep enough to hold multiple bags of rubber bands (3 to be exact) and it can store multiple looms as well if you leave out some of the dividers. Although, I have been storing my looms in a different case for awhile now; (a Recollections scrap booking case that has a large tray on top to hold my looms and a divided area underneath for rubber bands or what not), I still really like the Art Bin.


Anyways, enough of that. You've come for the tutorial, so I present to you my tutorial for my Herringbone bracelet. It takes 5 pin bars to make and is an advanced pattern. I recorded this video before I received the critiques on my other ones, so I have tried to edit it as best I can to satisfy all the suggestions. It is still not perfect, but hopefully, you are able to make this bracelet without too much trouble.


Enjoy!!


Tuesday, January 7, 2014

I Haven't Been Idle...

So, things are starting to get back to normal around here. The kids are back in school...well, kinda, they have had cold weather closures the last two days. We've just been trying to keep warm!


I haven't had time to get any tutorials together, but I have come up with several new designs, tutorials will come as soon as I can get them together. But until the tutorials come, I thought that I would show case some of them for you. Let me know what you think!


First, these are my attempts at a Diagonal Granny Square bracelet. I'm still trying to figure out how to get it to have a more square appearance. It did take 9 pin bars to make this bracelet. It could be made on less, just that these particular ones are on 9. 


Next, we have a Large Granny Square bracelet. I think it looks pretty fabulous...and I can just go crazy with all the possible color combinations! This was made on 6 pin bars wide. You can get 3 of the squares on 1 loom length.


Next, I have a bracelet I'm calling Fishnet because it reminds me of fishnet stockings. I really like this design, especially the little picots (small loop...crochet or embroidery term) that poke off the sides of the bracelet. They would be great for attaching charms to if you liked to do that. These bracelets were made on one loom length long and 5 pin bars wide. You would need 2 looms long to have it go all the way around your wrist.


1/8- Saw a very similar looking bracelet on Facebook, but again it is a different design overall.


So, in this sample, I was just throwing around some ideas on how to make another granny square like bracelet. Each square is actually a different pattern of band looping. Mostly it is the center of the square that is different. This bracelet was made on 4 pin bars wide and 2 looms long. You can get 4 squares on one loom length. Keep reading to see a bit more of each bracelet!


I think that this bracelet is beautiful! This is the perfect Granny Square bracelet. There is so much potential for color combinations!


I am calling this bracelet the Buttonhole. It is surprisingly simple to make. It's also perfect for me because I can actually use it with my buttons as you will see in the next picture. 


*Logging onto the Rainbow Loom Facebook page, I saw that a design called the Open Oval is now available. It looks similar to my design, but it is not the same. 


I'm not totally loving the color combo I used on this bracelet, but I like the idea of it immensely! This bracelet has a lot going on! On one end I have attached a button to the middle of the square. The squares along the middle have a bead that the center rubber bands are looped through. And finally the far end of the bracelet has a square from my Buttonhole bracelet.....Combine all that together and you can close this bracelet!


I love these beads! And this bracelet! It's kind of like my own little flower garden. I believe these beads were purchased from Hobby Lobby, but I swear I have seen similar ones at Michael's... or Jo-Ann's too. This bracelet just involves adding the bead to the center of my Granny Square bracelet.


I think this bracelet is adorable! It's the same Granny Square bracelet, only with a button added to the center. The colors give me the feeling of pop art.


So, this bracelet is still a work in progress. I am planning to call it Vortex. It is made on 3 pin bars wide. I'm just having a little trouble getting the bands to go where I want them to. I'm not sure if it will be important to place the colors of bands in a specific place in order to see the pattern or if I'm just missing something. I'm still working on it!


This bracelet is basically the same design as the one above, but I have removed the center divider bands...kind of. I'm still playing with it, but it is neat as it is actually bumpy. Maybe if I change the colors it will work a little better to see the design. (At least in my mind)


This is my Checkerboard bracelet. I absolutely love it! It's unique and different and just fun to look at! I did make one that had a dark border but I wasn't sure I liked it as much, but it was late, so I may not have been thinking straight!


And this bracelet I think is awesome, and surprisingly easy to make. I'm calling this my Elongated Checkerboard bracelet. It just looks fun! It's made on 5 pin bars wide and best made on 2 looms long. 


So what do you think? Hopefully you like my designs as much as I do! I'm working as best as I can to share my ideas! I've had a few critiques suggested for how to do my videos... some not so nice :(  ......but I'm going to do my best to make improvements. I just hope that everyone understands that I am not a professional and I am sharing my ideas because I love to create! And share! 

Anyways, don't give up on me yet. My kids are always the top priority and so my creativity takes a backseat when they need me...which is all the time it seems, lol.


Sunday, December 29, 2013

Removed Tutorial

I have removed the One Loom Kaleidoscope bracelet tutorial since there have been people complaining about it.  I will fix or redo it sometime... maybe. The original Kaleidoscope tutorial is still available.  

I am still busy with my family as they are all at home over winter break. Maybe once things get back to normal around here I'll be able to have more "me" time.  Happy Holidays! 

Tuesday, December 17, 2013

Large Kaleidoscope Bracelet Tutorial

Things have been getting crazy around here. It seems like the month of December just sucks away time without a person noticing. Shopping, visiting family,concerts, making cookies, snow that needs shoveling and adding all that on top of all the regular activities of boy scouts, basketball, cub scouts, and all the requirements of being a stay at home mom...I don't have much time to do activities for myself, besides take a nap that is.


I need to finish editing my Herringbone bracelet tutorial, but luckily all the shooting is done. I have had several requests for other tutorials and will be working on them as much as I can, as well as putting together ones for my new bracelet ideas. I will be working hard to get these done as soon as possible, it just may take awhile. Thank you for sticking with me! These are the requested tutorials I have been asked to make:

  • show how to extend the Stained Glass bracelet beyond the one loom length
  • tutorial using two looms to make the Stained Glass bracelet
  • more designs using one loom
  • instructions for bracelet from Nov 14 post

Any other requests?


I did manage to finish up the editing for my latest tutorial, the Large Kaleidoscope bracelet. It is made on 7 pin bars, but you could probably make it on 4 pin bars using the same technique as my one loom Kaleidoscope bracelet.


As always, Enjoy! If you have any questions, please let me know.


Saturday, December 7, 2013

Aww Phooey!!

So apparently the video I uploaded to YouTube for my Kaleidoscope bracelet on one loom got distorted some time during all the rendering and uploading. I'm sorry to anyone that had issues with watching it; I know I would be disappointed!

I have re rendered the video and am currently uploading it to YouTube once again. Hopefully, there will be no issues this time. I was really excited to share this bracelet using just one loom, so I'm super disappointed there were issues. The new video should be up and running sometime in the morning.

So, to make amends, I am presenting my tutorial for my Stained Glass bracelet. This one is made easiest using 9 pin bars, but I explain a bit in the video how you can make variations of it using less pin bars. If you have questions about this bracelet, don't be afraid to let me know!

Also, this bracelet can be a little confusing in the looping of the perimeter bands. I apologize for that! An advanced rainbow loomer should not have too much trouble figuring out which bands to loop first in the middle. 


Enjoy!


Sunday, December 1, 2013

Busy, Busy Busy!!

I have been super busy! My family and I went out of town to visit the in-laws who are some wonderful people. We were lucky enough to stay in a hotel with a pool, so the kids had something to do when we weren't visiting or eating...so much eating!

I was able to do a little shopping though, even though it just involved my husband dropping me off outside the mall while he did laps in the parking lot. See, I live in a fairly large city for my area (60K) but they don't have the options...for rubber bands...that the city I went to does, which has a population of around 360K, not including the vast suburbs...and being black Friday weekend, it was crazy to just go near the mall. So, a thank you to my dear hubby is in order, lol. Anyways, all that means is that I have some new colors to play around with and I didn't have to order them online...or wait for the stores around here to start carrying them!!! So many bonuses for a little bit of annoyance.

I have been working on new tutorials. I have finished a tutorial for a Large Kaleidoscope bracelet and will post it to YouTube as soon as it starts cooperating...2018 minutes to upload is a little ridiculous! I will try again later and hope it works in a reasonable time.

Also, for those of you who actually read my blog (Thank You!) I thought that you would like to know that I have figured out how to make my regular Kaleidoscope bracelet on 1 loom (that's right, just 1!) It looks almost exactly like the one made on the 5 pin bars. I saw that a lot of people (kids) were disappointed that my bracelets required so many looms and I wanted to do what I could to remedy that. I was reminded that I was an adult with my own income, not a child who had to convince parents to re-buy the same toy again or save up the money (which could be very hard to do!) I will be working on putting together a tutorial ASAP!


So, to sum up...There is a lot coming! Stay tuned!