Wednesday, November 27, 2013

Wave Bracelet Tutorial (with rings)

Just in time for the holiday weekend! Sorry it's taken so long to get this one ready. My oldest son is in boy scouts, band and basketball and it seems like he needs to be every where at once...And add in a child with Autism and two other kids under 3, I'm one busy Momma! Nap time is my favorite part of the day and that is when I get to work on all my craft projects.


I present to you my tutorial for the Wave bracelet. I decided to add the rings on this one, but if you want to leave them off, the looping is the same. If you look closely in the video you will see that I forgot a rubber band in one of the corners, although it didn't effect the outcome...then I also broke a rubber band in one of the parts I warn you about because of there being so many rubber bands on the pin. I also forgot to re-loop a rubber band when I fixed my broken one. Not exactly a shining example of how to make the bracelet, but I think I edited it well so that you will be able to make your own. 


As always, I hope you enjoy my patterns and if you have any questions, please don't hesitate to contact me! 


Enjoy!


Thursday, November 21, 2013

Lattice Bracelet Tutorial

I finally present to you my video tutorial for my Lattice bracelet. I had to get some new video editing software and learn how to use it. It's still not perfect as the program has so many options that I'm still trying to find the ones that I'm used to using in my previous program. Anyways, thank you for sticking with me. Those of you who have subscribed to my YouTube should be notified shortly that the video is available.

I am just starting the editing process for the Wave bracelet and should have it up soon.


Lattice Bracelet Tutorial


I hope that you enjoy. As always, if you have any questions, please let me know and I will do my best to clear anything up. Thank you!


Tuesday, November 19, 2013

Update + New Deisgns

I'm working hard to get more tutorials ready for my bracelets. I ran into an issue with my editing software and I'm trying to figure out a work around to get it to do what I want. I do really appreciate everyone that enjoys my designs. Keep checking back to see where I'm at and for new updates. I will have the tutorials done as soon as possible!!


I haven't been idle though. I've been working on new designs.


This one is extremely close to the Flower Power or Plate bracelet patterns. However, adding just a few more bands gives it a rounder appearance. I'm thinking of calling this one the Bubble bracelet, because my youngest son called it bubbles when he looked at it . I'm guessing that this design may have been done before, but I haven't noticed it. This was made on 5 pin bars. With some extra fussing, it could probably be done on 3 pin bars.


After I made the above bracelet, I decided it would look cool if I doubled it. I think it turned out pretty neat. I made it using 9 pin bars, but you could make one side on 5 pin bars and then combine them fairly easily. So, this is my Double Bubble bracelet.


So, of course, looking at the last bracelet, I decided I needed to fill in the holes in the center of the bracelet. I really like this one. I think that I'm going to call this the Argyle bracelet. If the colors were moved around a bit, it may be more apparent that it has an argyle pattern to it. Or, maybe, I will go with the name Checker bracelet, since it could be seen as that too. Ah! I'll have to decide some time. This one was made on 9 pin bars and I don't think it would be possible to make it on any less. It is also a huge pain to extend it beyond one loom length. I actually had to undo some of the bracelet to get it to go together with the extension.


So, what do you think of these designs? Have you seen them before or are they as new and neat as I hope they are?


Thursday, November 14, 2013

Bracelet Needs a Name

These designs are probably the first that ones that I came up with. Basically, they are variations of the star burst bracelet. I haven't quite decided on a name yet. Obviously, I can't use star burst. I thought about the x bracelet since the design does have an x in it, but there is already a double x, so that name is out too. I'll have to think of something. Anyone have any ideas?


This is the first bracelet. If you look at the purple rubber bands, you can see that it makes an x pattern (not quite the * pattern in the star burst.)


This is the second bracelet. Basically, whatever name I come up with for the first bracelet, this will be a lite version of that one. This bracelet is nice for adding beads to because of the spacing it has.


And here is an example of the previous bracelet with beads added. It looks really nice with the round beads


This is an example of what it looks like with pony beads used. It looks pretty great too!


Now, this was actually insane to do, but I used pony beads in the center of the x's on the bracelet. This was not easy to do and I had to use a small gauge crochet hook to pull the rubber bands through the bead. When finished, the bracelet is really neat. It feels very solid and is gives another dimension to the bracelet. I haven't seen anyone add beads this way and I would not recommend it unless you are an advanced loomer.


Example of pony beads added in the center on the fuller bracelet. It was hard!


Here it is stretched out to give you a better look at it.


What do you think of these bracelets? Can you think of a name for them?


And I'm working hard on the tutorials for my other bracelets! It's been awhile since I made videos and I forgot how long it takes to not only make the videos, but to edit them and then wait for them to render to be able to upload...which also takes awhile...


Just send happy thoughts to my youngest kiddos to keep on napping, that's about the only free time I have!!


Wednesday, November 13, 2013

Kaleidoscope Bracelet Tutorial

I posted pictures of my bracelets on the Rainbow Loom fan page on Facebook. I was really pleased to see the response they received. Thank you so much!!!


I finally got it done! 


Here is my video tutorial on how to make my Kaleidoscope Rainbow Loom Bracelet.


Enjoy!!


I haven't made videos for a long time, so I hope that everything is clear. If it isn't, please let me know so that I can fix it or if you have questions about how I did something, let me know that too!!!


Kaleidoscope Bracelet

The next design I came up with I'm calling "kaleidoscope" simply because it reminds me of those toys you look through that changes color as it moves around. Although, I did toy with different names, particularly circle something or other, since it is pretty circular, but there is already a circle bracelet. The only bad thing about this bracelet is that it requires you to have 5 to 7 pin BARS to make it (so 2 or 3 looms).


This bracelet was made on 5 pin bars. It is a little more on the oval side, than round, but it is still awesome.


This bracelet was made on 7 pin bars. It definitely is round in appearance and you are able to add more color to the bracelet. The circles are about 2" in diameter. It looks really neat when you wear it!


The following pictures are of the 5 pin bracelets with extra loops added to give them a more ornate appearance. I think they look pretty this way, not exactly a flower, but just a touch more feminine.


This last picture is of a 9 pin bar bracelet that I'm working on. So far, I think it's looking pretty good!


So, what do you think of these bracelets?


Monday, November 11, 2013

Wave Bracelet

I put this bracelet together the other night. I think it looks pretty sweet. This bracelet does require 2 looms to make though.


This was my first attempt. I didn't like that it wasn't quite wavy enough on one of the edges, so I made it again as pictured below.


This was my second attempt, and I think that I nailed it. It's super wavy and looks great with the striped appearance.


And of course, I had to add some extra loops on it. On this one I just added the loops to the peaks of the waves, though I think it would look just as pretty with loops added all the way around.


So, I added some all the way around. I have to say that this is one of my favorites!


Are you a fan of the wave? Let me know what you think!


Rainbow Loom bracelet with button closure


Doesn't this bracelet look fantastic? Firstly, I love this pattern from the Made by Mommy blog called the Daisy Chain. This pattern can be found here. I change it a little bit when I make it though; I double the rubber band that goes between the daisy chains simply for personal preference and the other thing I do, of course, is add a button for the closure.


In my previous post I showed how to add a button to close the fish tail bracelet and now I'll show you how I use buttons to close other bracelets. 


1. In the picture to the left I have already placed all the rubber bands for the bracelet. Now I need to add the button. This button has 4 holes, so I'm going to use 2 rubber bands to attach it to the bracelet.


2. Here I'm using a steel crochet hook to pull the rubber band through since it's the holes are too small to push the rubber band through.


3. I like to cross the rubber bands when I pull them through, but you can just go up and down too or just use only one rubber band instead of 2. It's whatever you prefer.


(1) 
(2) 
4. On the end of the bracelet that you would start looping (opposite end from red arrow) you will attach the button to the loom. Images 1-3 show how I added mine. Once that is done, you can loop the rubber bands like normal and then pull the finished end over the button to close it. 

(3)


Another view


Any bracelet that you want to add a button to can be done by adding a "button cap" to the beginning of it. You can use one or multiple buttons. I will show you how to do that in another post. I hope this helped and that you love it as much as I do! And I haven't forgotten about sharing my new bracelets with you, they're coming!


Sunday, November 10, 2013

Rainbow Loom Craze


The Rainbow Loom has finally hit our area! I may be a little older than the other enthusiasts for this neat toy, but it reminded me of a something I played with when I was younger, so I had to try it out. I was not disappointed...for the most part. What I found disappointing was that there weren't readily available, easy to follow, non-video directions to be had, especially for the more complex bracelets. Also, I am not a big fan of the c or s clips used to close the bracelets (I have a solution for that though, which I'll share later!)


Now, I like to craft, and when I do, I go crazy making sure that I have as many colors and styles available, but I absolutely hate to pay full price or miss out on paying a cheaper price just because I didn't check another store. Just ask my husband about my craft cupboards, closet full of yarn or my totes of pony beads...or how giddy I get when I find good coupons! Though I'm not against online shopping, I definitely have a "want it now" mentality, so shopping online doesn't work very well for me.


So, checking around my area, Michael's is the only one currently carrying the official Rainbow Loom and they seem to be having a hard time keeping it on the shelves. JoAnn is carrying the Larose rubber band bracelet maker and I saw that Wal-Mart is starting to sell their version online called the Wonder Loom, so that will probably be in stores soon. Once you have the loom, you need the rubber bands which can be pricey if you have an active loomer. JoAnn is doing their best to compete by carrying a larger variety of the rubber bands for a cheaper price ($1.99 for 500 of the regular colors and $2.99 for 500 of the specialty ones, ie., glow-in-the-dark, glitter, tye-dye, striped, etc.) I've been able to find the rubber bands at other stores too, like Books-a-Million ($3.99 for 500) and the Dollar Tree ($1 for 100). By far, the cheapest place I've found them is Sally's Beauty Supply (and Walgreens) which sells them as hair rubber bands, not loom toys, which makes them a steal at $1.79 for 500. Now they have a little different texture, but they are not the cheap plastic ones that have become popular for hair. I found them at Sally's in neon (pink, green, yellow, blue), black and brown. I was pretty excited about the brown too, since it wasn't the norm. 


In the spirit of keeping costs low, I was pretty annoyed that Michael's wasn't accepting any coupons on the Rainbow Loom or the rubber bands, but I could maybe see why since they seemed to help take the toy mainstream when it was only doing so-so at the Learning Express stores. So, I blew that annoyance away, particularly since there is also a JoAnn's in town and I could get the rubber bands cheaper and I could use coupons!...but just 3 days ago, JoAnn established their no coupon use policy on their looms or the rubber bands. Booo to you, JoAnn! At least I had stocked up a bit before this went into effect, saving a little bit of money.


At the beginning of the post, I said a had a better way to close the bracelets and I think I do. I haven't seen any other examples of this on the web, yet. Now, I have seen that people have been adding charms, beads or other things to fancy up the bracelets, but they still have that c/s clip which I think cheapens the whole bracelet. (Can one cheapen a bracelet made of rubber bands?) 


I have found a way to use a button as a closure on just about every bracelet (I haven't tried the hexafish, but I'm sure I could make it work) completely eliminating the c/s clip and making the bracelet seem less like a kid's toy and more like something an adult could wear. And let's face it, you know your kids are making these for you to wear, so why not upgrade it to something you would wear all on your own!


This is the direction for a fish tail bracelet using a button closure:


(1) Using  a crochet hook
(3) Finished
(2) Using string
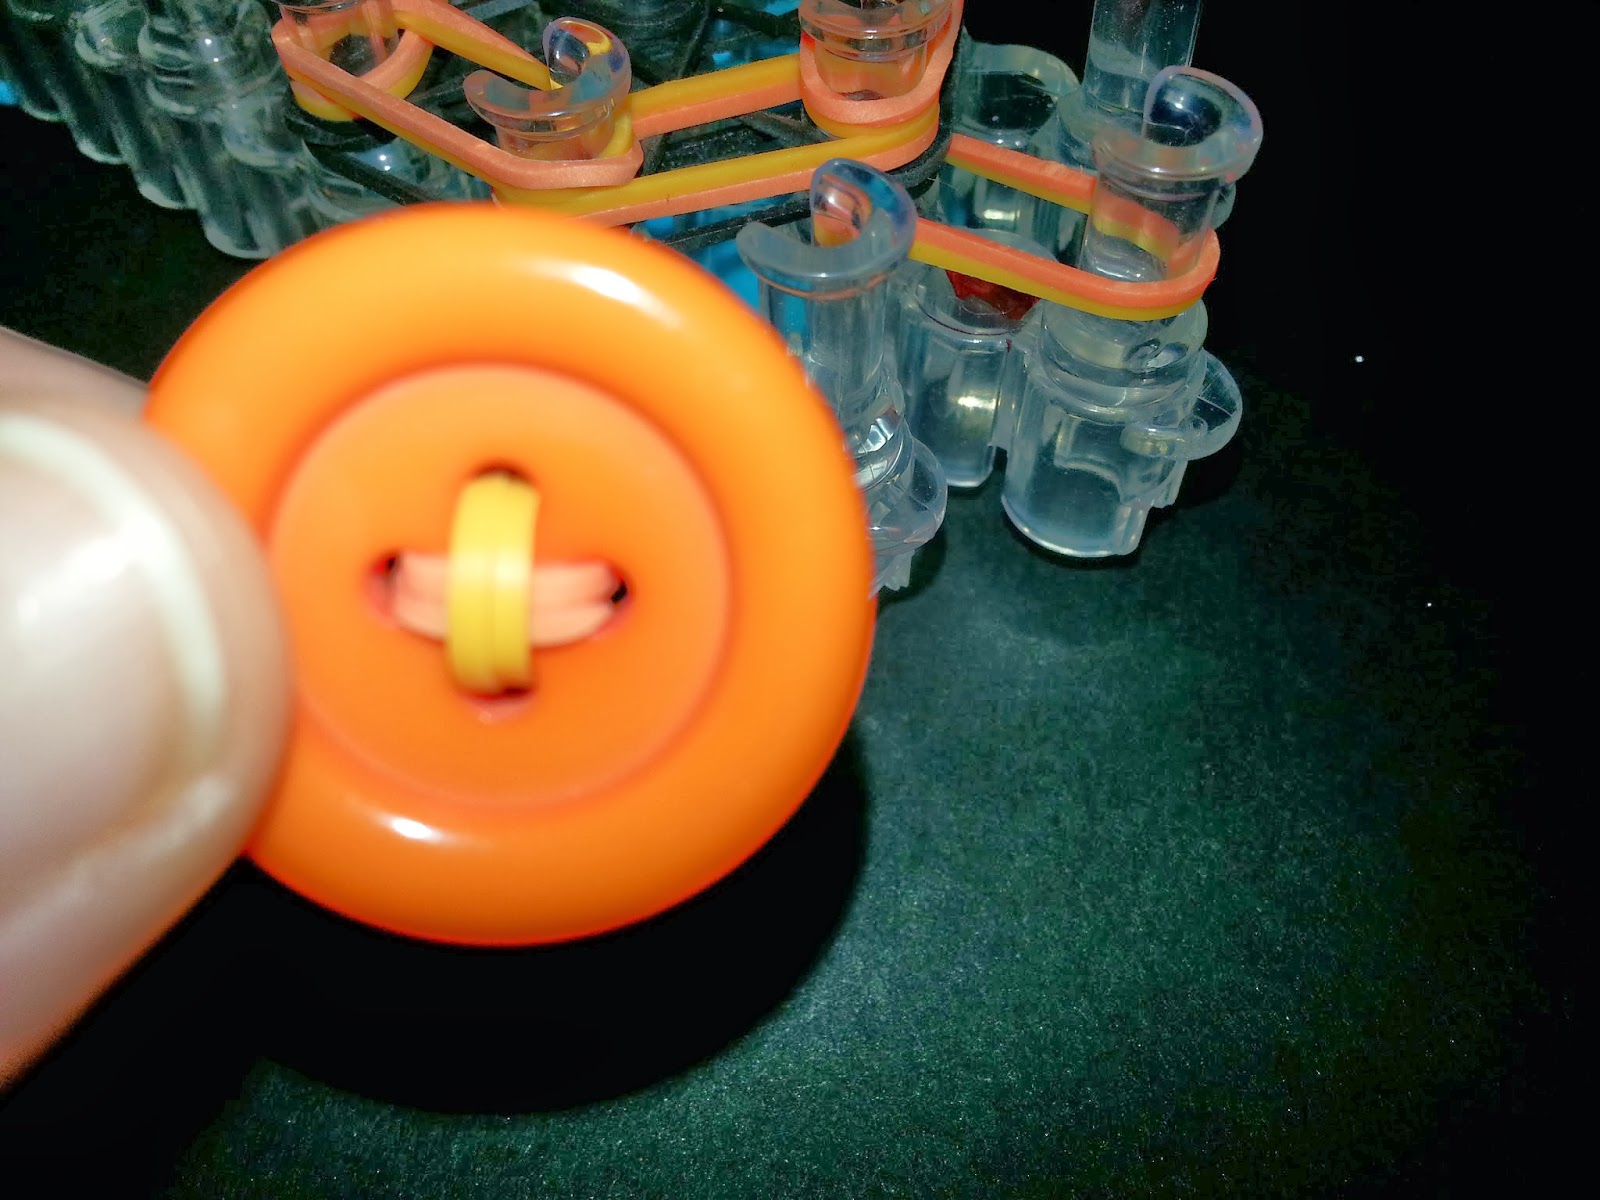
1. You need to find a button you like and decide on your design. This button has a circle shank on the back which makes it easy to thread the rubber band through, which is what you need to do first. If you have a hard time getting the rubber band through, try using a small gauge steel crochet hook to pull the rubber band through (1) or you can loop a piece of string through the rubber band (2) and then thread the string though the shank pulling the rubber band through that way. This button has a large hole so I didn't need to use a hook or string, but with other buttons, it's a lifesaver. Once you are finished, it should look like the picture in (3).


(4) How to place on the loom
First few steps
Complete
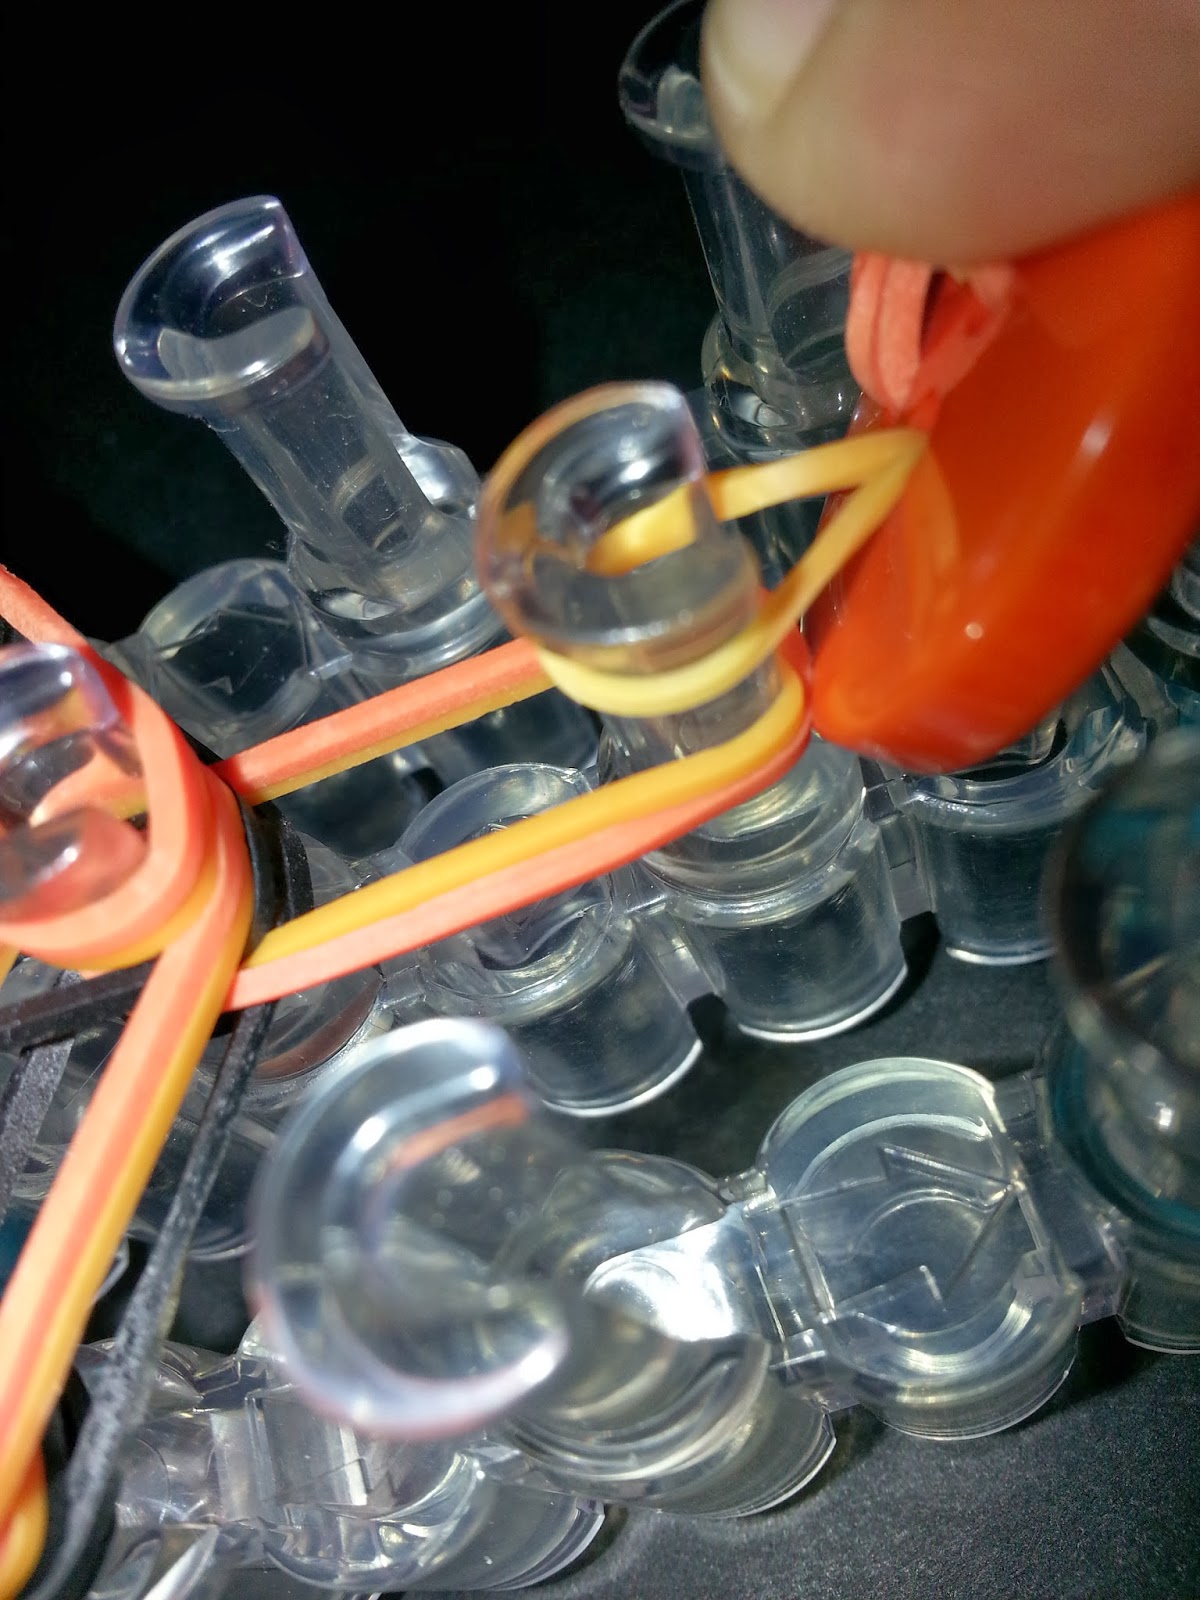
2. Now you need to add the button to the loom (4). On a normal fish tail bracelet, you would take the first rubber band and make a figure 8 with it. Adding the rubber band with button eliminates the need to do that. Now you add your next two rubber bands on top and complete a normal fish tail bracelet.


(5) Wrap the rubber band around the button
3. Now you simply remove the last rubber band from the loom and wrap it around the button like it's shown in (5).


Doesn't this look great? No cheap looking c/s clip! It stays closed and the possibilities are endless with the types of buttons that are available to use. 


That's all I have for now, but I will get another post made using buttons with holes and the different ways to attach them to bracelets. I also have a couple of bracelet ideas I haven't seen used before, so keep coming back to check for more!